Tuesday, April 1, 2014

Extremes


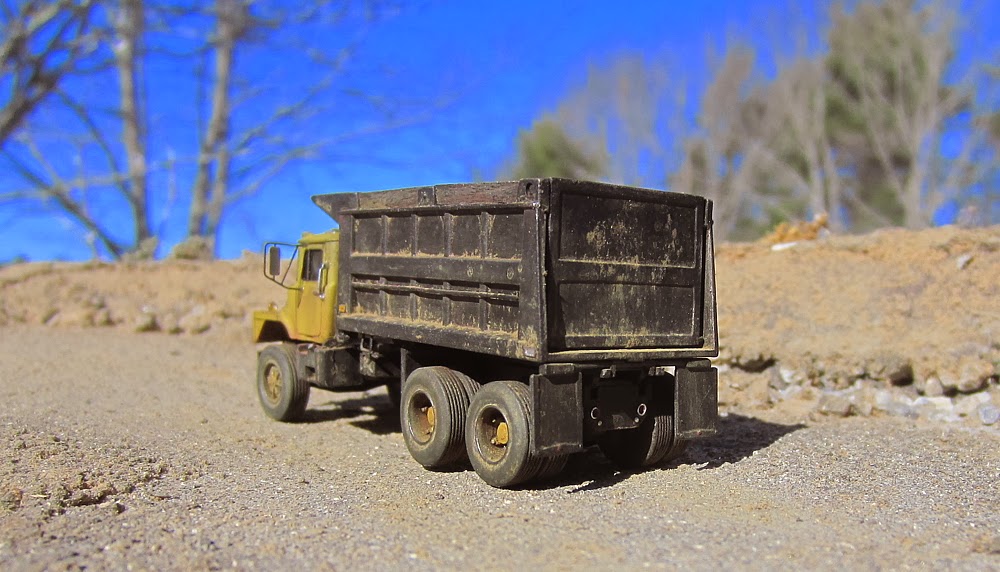
 Seems like I jump from project to project without much thought given to a theme or era. I guess that's what makes this modeling thing so interesting to me. I'm not locked into any one particular time frame or type of vehicle. Or even whether I will be doing a vehicle or a house, barn or whatever. Anyway, I've certainly strayed from any coherent pattern here this month. Without a doubt the largest vehicle I've ever built is the Mack M75 quarry truck you see. This is a kit from Ralph Ratcliffe Models that has his usual, exceptional fit and finish.  Not quite as heavily weathered as I did to it's little brother the M65 a short time ago.


A definite departure from this monster is the next set that I decided to pair up together. The Jordan Ford Model AA is obviously a favorite of mine if you've seen many of the other postings I've placed here. I built the wrecker bed and tow unit for this truck from scratch out of styrene. Wanting to finally do a tow truck pulling a wreck, I turned to another Jordan, the Model A sedan.


I really worked this one over. By taking the Dremel tool to the inside and chewing out some plastic, I achieved the rotted look you see here. And with a series of washes and dabs of chalk got what I thought was a pretty awful looking car. A broken window, exposed engine and front hubs and the open roof with ribs showing add to the dilapidated look. If you go back two posts there is another quick look of this wreck sitting in my new garage.


At the Springfield show I picked up Sylvan's newest kit, a Fruehauf livestock trailer that is resin with laser cut wooden sides. These are very delicate but manageable if careful. I paired this with the Chevy cab over from Sylvan from the early 50's which is a good match to the time span of the trailer.


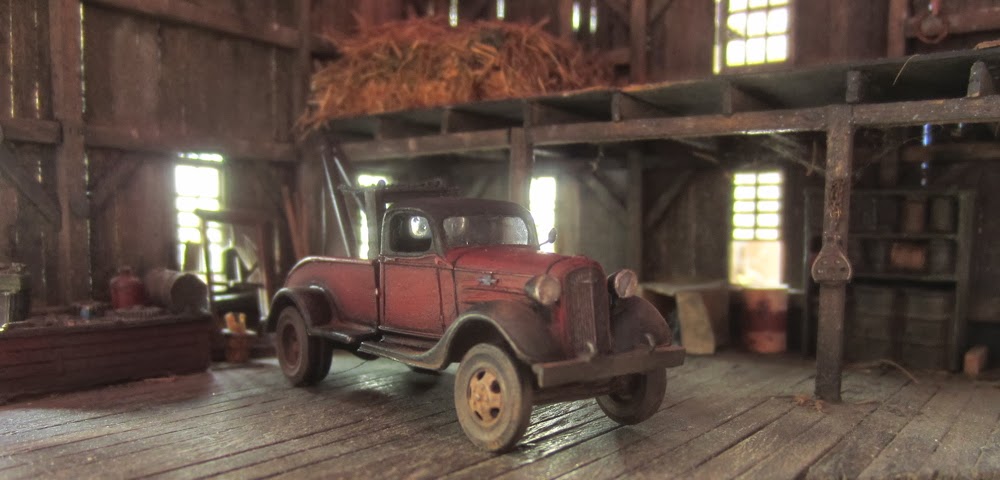
Last and most recent is just one more of those Roco pieces that I've been able to acquire through the help of others. The rack body here is scratch built out of styrene and here's another shot from inside my truck repair garage.


Well, I jumped around quite a bit here. And as spring fights hard to take hold here in Maine, I hope you all have fared well through this, the toughest of winters I have seen in a while. And as the flowers begin to poke their shoots through the soil, give remembrance to those you have loved and lost.


thoughts from long ago

I wrote this many years ago for a web site that is still in existence but has slowed in traffic. I still go there to see if any of my old friends are posting things of interest as they are a highly educated group in the realm of 1/87 scale vehicles. Sorry no photos accompany this writing but it struck me as still very much appropriate to my feelings on the hobby.


I started this as wanting to get an opinion poll going but when I finished writing I forgot what I was going to ask a poll about. Your forgiveness is requested if this seems a bit too editorial for these pages. I'm off on another rant today, please forgive it's lengthiness.

Every forum or list that I subscribe to ends up having a topic posted like "who are we?". And inevitably everyone gives a brief summary of what they are in this life. Husband, father, construction worker, investment banker etc., how long they've been at it and a brief blurb about how long they've been modeling. This is fine and good and I am very interested and actually quite amazed in the diversity of the participants in our hobby. But it doesn't really say who we are as modelers. It shows us all of the differences in us but doesn't address what we share in common as modelers. One must delve much deeper into the psyche of a modeler in order to find the common ground that makes us as devoted to our hobby as we are. Of any form of recreation that I participate in (I love to fish and I'm a minor sports nut), I have come to the realization that those that share this one with me are the most preoccupied and enthusiastic (some may say even fanatical). Truly a rare breed and in most cases a subject of concern among their families. ("Is Dad alright? He's been poking at that model over 4 hours now.")

It is an odd occurrence that would put me in my pick up to go somewhere, even if only down the road a short piece, that I am not imagining something I would like to model. An old truck in a field, a barn, a tree even a culvert that is passing under me, all become subjects for consideration. Immediately the wheels begin to turn or the light bulb goes off or whatever you use to describe the smell of an idea being born (you don't smell things burning when you think ? hmm..) Thought then turns to the elements of the build process that would bring any of these subjects to fruition in miniature. "OK, now draw it out...and you'll need some 1/16" diameter tubing and some scale wood...hmm... how long to put that part together ?" Soon you have a plan or at least the start of a plan. Now don't make me paranoid by saying this doesn't occur from time to time to you. I know I'm not alone in this thought process and it's time you all came out of the closet with me.

Now that we've established at least one thing in common (hopefully), we share some of the same thoughts as we observe the real world passing by our windshield. Or at least some kind of pattern in our thinking that seems to want to translate everything we are in contact with into miniature. (I tried this with my mortgage but the bank wasn't going for it). I won't try to explain why this is so, I'm not qualified to make that call. These thoughts help to get me through the day, is all I know.

Let's examine too the reasoning that takes place as we go through the day. What takes place in your cranial cavity when we are sorting through the cabinet under the sink or the coffee cans stacked up in the garage filled with every screw, nut and tiny piece of wire that we've ever run across? There isn't one nook or cranny in my shop that hasn't been thoroughly examined for items that possess model building attributes. (what the heck is a cranny anyway ?) All the materials that pass before us become fair game and hold possibilities of becoming a part of our next model. Or at least an integral part of the building of that model. When I asked my wife for her used compacts, I thought she would have me committed. I got equally disturbing looks when I wanted old stockings and nail polish too. But hey, these are standard tools of the hobby we're talking about here. Actually this has all worked to my advantage because now I am thought to have, shall we say, a stability issue, and it drums up a lot of sympathy.

There is one last habit that confirms our bonds and that is the one we are currently sharing. The computer access to the internet has been invaluable in finding those other lost souls who's minds are filled with visions of the world in miniature. We are thrilled at the opportunity to share a technique that works for us and to exhibit the results. We are gratified at the positive responses we get and are appreciative of the constructive criticism. It is pleasing to view the successes of others and motivating to see phenomenal accomplishments. I personally jump at the chance to get any new information "on the web" and make it part of the electronic highway for those as interested as I am to view. I'd like to take the old saying "misery loves company" and give it a new twist by saying that this common interest we all have, loves it's company.

Now this all may sound a little strange to some and I wouldn't blame you a bit if you walked away saying "man, this guys' wife has it right, he's nuts". But I know somewhere out there, someone knows that what I'm saying is so. I'm sure I haven't covered all the little oddities we share because of whom we are and I'd like to think some of them should be kept to ourselves. There is something about who we are that many of us share and it goes beyond what we do to pay our bills or how many kids we have or where we live. It resides in a space inside of us that loves to create and we have chosen to do so in miniature. Perhaps what is most comforting about this is the ability to transcend all the barriers of race, politics, religion, income and I guess even gender and age.
To be modelers first, that just happen to be real people.

Saturday, March 22, 2014

New photo backdrop


When I attended the Amherst Railway show in Springfield, Mass. this year, I had several folks wanting to use my barn diorama for photo opportunities. Unfortunately, the diorama is much smaller in real life than people imagine and does not accommodate larger vehices. I did so want to be able to see a piece from Joe Enriquez or Ralph Ratcliffe look well in my barn. And Andy Madden made some valiant attempts with his camera with satisfactory results. And as good as they turned out there was something not quite at home about them. So I turned to my diorama building again and designed and built the garage repair interior that you can see here.


I started with Evergreen styrene brick patterned sheet cut to a proper size and fit the windows and door. Using a spray can satin black decanted into the airbrush, I put a coat on it and a sheet of plain styrene for the floor. I used a mixture of Terra Cotta and Crimson Red thinned with Windex in the airbrush to give several successive coats to the walls allowing for drying between coats (accelerated with a hair dryer). A thin coat of clear flat lacquer was then sprayed on. To that, I applied a mixture of powdered chalks in a gray color and alcohol. This dried quickly of course and was buffed with a paper towel followed by another coat of the clear flat lacquer. Some dusting with dry chalk powders finished the walls. The windows and door were painted with Ivy Green acrylic.


Attention was turned to the floor already in black. I scribed expansion joints in the plastic and scuffed it up a bit with fine sandpaper. Again, using cheap craft paints, I thinned gray, tan and black for the airbrush with Windex and sprayed several coats allowing them to dry between each. A thin coat of the clear flat lacquer on that and when dry, a series of acrylic washes to simulate stains.


In order to get the walls to sit firmly on the styrene floor I glued a piece of styrene L channel to the floor and when set, the walls to it. A small storage loft was built in one corner with stairs.


It was then a matter of creating and adding details. a small workbench was built out of wood and the rest of the details were from my collection of cast metal, resin and laser cut card stock. Some signage was created on the computer and printed. As time goes on I will be adding and taking away details to suit my fancy. I have been using Microscale Liquitape to fasten details so they can easily be moved or removed.


A few pics here of me fooling around with the camera in my new garage.


I'm sure you will be seeing a lot more of this in the future. The lighting possibilities are endless. I would like to , at some point add a roof system with lighting and a chain hoist but at this point, I can't figure out how to support it without putting an obstructive post in my camera positions.

Well this was a very quick, fun build. Thanks for looking. And do something nice for someone today.

Saturday, March 1, 2014

While the woodpile is evaporating


Well it seems so anyway. This winter has been brutal from a temperature standpoint in many parts of the country. So tell me, the rest of America, how does it feel to share our New England weather? Seems like it's the subject of every meeting you have with someone. I listen to folks coming back from vacation in the warmer climes and I am envious to some extent. But then I envision the last day of such a vacation and couldn't bear the thought of packing up and coming home to this frigidity. I'll bear with it and keep my eye on the calendar as the days get x-ed out. Frankly, I do not mind being out in the cold, I dress properly and haven't any issues, even liking the zero humidity as the mercury dips below the same. I like the sound of the snow as it squeaks under my boots when it gets down around 10 or 20 below. It's seeing all that hard work put into that woodpile disappear so fast and getting that oil bill every month that's a bit discouraging. It does however afford more time at the workbench. And here are the fruits of that time for the last few weeks.


   I keep receiving discards from Ralph Ratcliffe's line of terrific resin pieces in the mail and honestly, they are more precise and crisp than most resin outfit's regular offerings. This Mack DM600 steel hood cab is no exception. I really had to look hard to find anything wrong with it but Ralph is such a perfectionist that he refused to sell it. I had picked up another of the Athearn kits while at the Springfield show this year from Trip Aiken of Truck Stop Models. I really like these kits, they are extremely well detailed and that they have no paint to strip off makes starting them easy. I needed a good dump body for the DM and the Mack R model kit supplied the one for this model. The chassis is resin, also from Ralph (I bought this) and I added Ralph's suspensions, step fuel tanks and wheels. To the dump bed I added a foot rail and marker lights. The plastic scuff boards were cut off and replaced with wood. And lastly, a tool/chain box, mudflaps and A-Line mirrors were applied and I built the exhaust system, front bumper and frame plate at the rear with photo etched lights. The dump bed actually raises using the ram and piston from the kit adapted to the resin chassis.


   To get the muddied look on the bed, I painted specific areas with a clear flat acrylic and sprinkled artists chalks into the wet finish.


    This next Mack is the rest of the Mack R Model kit cab, chassis and wheels with the telescoping boom from the Athearn Ford F850 kit to make this tractor mounted boom truck. The fifth wheel, tool/chain box and chain on the bumper were added to make what has become a favorite. The heat shield on the exhaust is from Masterbilt model. I really like how this truck turned out and now I need to figure out what to use for a trailer.


I picked up a few Jordan Miniatures and set right to work on their Ford Model TT truck. The bed is my depiction of a grain bed that isn't quite like the prototype I modeled the truck after but is close enough and plausible in my opinion. It is entirely scratch built from styrene.  I left the little flathead exposed here since it would be a shame to cover it up.


   Well that's about it for now although I have a few more on the bench in progress. I hope you all stay warm and if you're not, find someone you love to cuddle with.

Thursday, February 6, 2014

Time is distance


Ever since I was  kid, I always wondered why folks use time to tell distance. It's about 60 miles to Portland from here but if you were to ask anyone, they would say "It's about an hour and a half away." The store down the road is "only a few minutes from here".  The last job I did in Penna. was about 7 miles from my house. It took about 40 minutes to get there.  When I moved to New Hampshire, my first job was almost exactly the same distance, 7 miles. But it was only about a fifteen minute ride. So even though each were the same distance away from my home, I would say that one was 40 minutes away and the other fifteen minutes away. Of course we all know why. There were no less than a dozen red lights and lines of traffic in Penna. And the N.H. run was a straight run on a 55 mph highway. In fact when I first moved to N.H., there were no lights within a 45 minute ride of home in N.H. (that's about 30 some miles) And trying to funnel all that traffic through all those interchanges in Penna. was like moving a lot of water through a small diameter pipe. It just doesn't get done quickly.

So what does this all have to do with modeling? Absolutely nothing. But it does say something about how we think. Our time is valuable to us. And we would rather see distance in terms of the time it takes to go from one place to another than on the actual measure we have relegated to distance. Our perception of time takes precedence over distance. OK, enough thinking out loud, now to the models.


I've mentioned the Athearn vehicles in kit form before and picked up another of the Ford F850 kits. I used the Athearn frame and placed the Boley roll back wrecker unit on it. That's basically it except for the paint and weathering. The 'advanced design' Chevy pickup (1949-54) is from Busch and I replaced the wheels with plain steel rims from Jordan.


Next piece I did was another quick, down and dirty model with not a lot of fanfare. I chose the Sylvan Scale '37 Chevy panel truck. Aside from putting the plain steel wheels from Jordan on it, fitting an acrylic windshield and of course the finish, there's no change to the model as it comes in the kit from  Sylvan. The last photo of this truck has some 'photoshop' type effects that I thought made it look like a hand painted post card.


This last one has become a favorite. It's the first of Clare Gilbert's (Sylvan) 1936 Chevy trucks that I have done. I scratch built the wrecker unit and the bed for it. The wheels are from Jordan again. I jacked the cab and body up slightly to give the truck a bit more aggressive stance.


So a little trip back in time (how far is that?) for this posting. Thanks for taking the time to visit and no matter how far away in time or distance your loved one's are, reach out and give them a call.